I have had the same tree skirt since 2004. From 2002 to 2004, my husband and I taught in a small Inuit Community on an island nestled next to Baffin Island, Qikiqtarjuaq. During the darkness of winter, a friend and fellow Newfoundlander, Sheila Lewis, would spend every Saturday afternoon sewing. This tree skirt was one of the projects we did. I just spent the last 1/2 hour going through my patterns because I thought I still had the instructions, but all I could find was the first page with the picture only. It will probably show up when I am not looking for it. If so, I will add it later.
The front.
The back. So it's reversible.
Under the tree.
Monday, 19 December 2011
Felt Tree Decorations
I have used felt to make some tree decorations. Most of these came with a little kit that I bought at Walmart, but they are easy to make without a pattern.
Sunday, 18 December 2011
Burlap Tree Decorations
Over the past couple of years, I have made some decorations for my tree. I am going to show a few-- too many to do them all right now. Hope you enjoy.
These are a sample from the burlap decorations.
I made bows out of red burlap..
Other Burlap decorations.
These are a sample from the burlap decorations.
Saturday, 17 December 2011
Candle Re-do
I know that Christmas is practically over now, but I want to post a couple of things that I did before and didn't have the opportunity to post it.
This was the candle as it is all year round. I wanted to make it more festive looking so I removed the cream coloured décor.
I added some twigs of berries.
Next I used the burgundy candles and used straight pins to add the rusty stars. I stuck a pile of cones onto a piece of cardboard and laid it on the stand so that I could remove it after Christmas again. Then tied some fabric on it for bows.
Friday, 16 December 2011
Christmas Centerpiece
Wow! Christmas is almost here and I have so many plans that are nothing but plans. I wanted to do so many crafts, but I should have done them back in October when I still had time. However, as I decorate I am making some new decorations this year. One is my centrepiece. I was recently visiting my niece, Kelly, when I noticed this large bowl that she was going to get rid of. I became the recipient of this and it became the foundation for my Christmas Centrepiece. I am quite pleased with the results
This was what I started with. A large bowl that I turned up side down and a wreath. I added the red bulbs as well.
Then I added some of my large cones and some ribbon around the base and to make a bow.
Around the top I put a wreath of berries.
Then I used a candle for the centre.
This was what I started with. A large bowl that I turned up side down and a wreath. I added the red bulbs as well.
Then I added some of my large cones and some ribbon around the base and to make a bow.
Around the top I put a wreath of berries.
Then I used a candle for the centre.
Monday, 5 December 2011
Fabric Cones Hanging
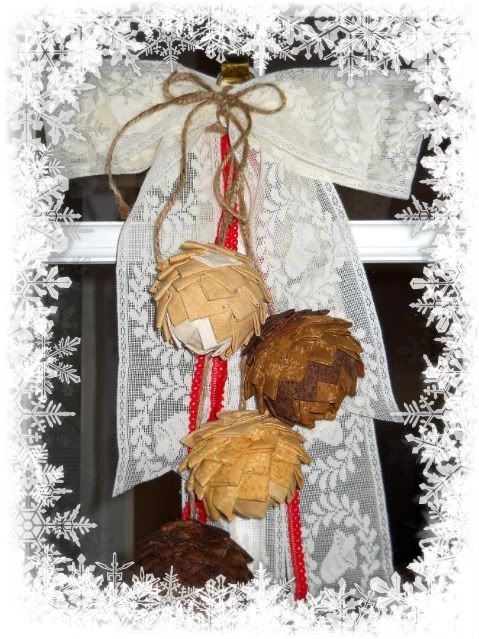
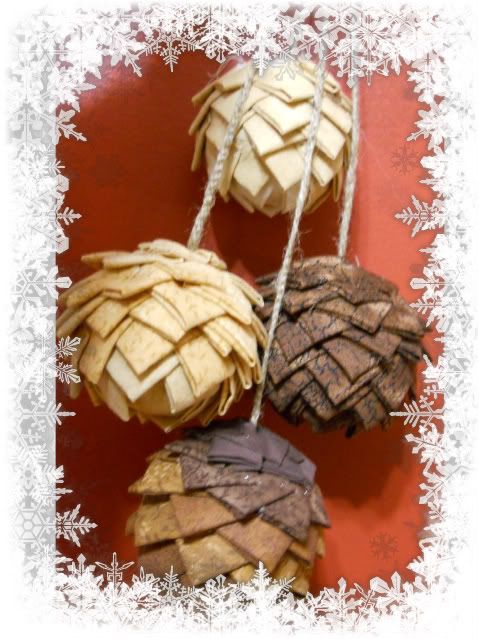
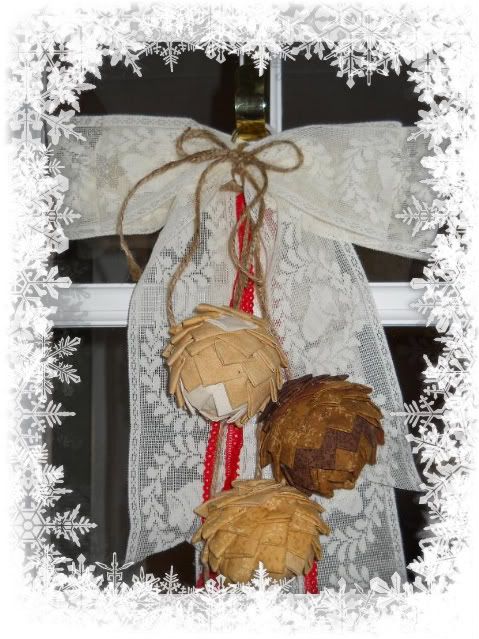
Prior to going home this weekend to visit my parents and collecting many cones, I started to make some from fabric. I made 4 and created a hanging for my door.
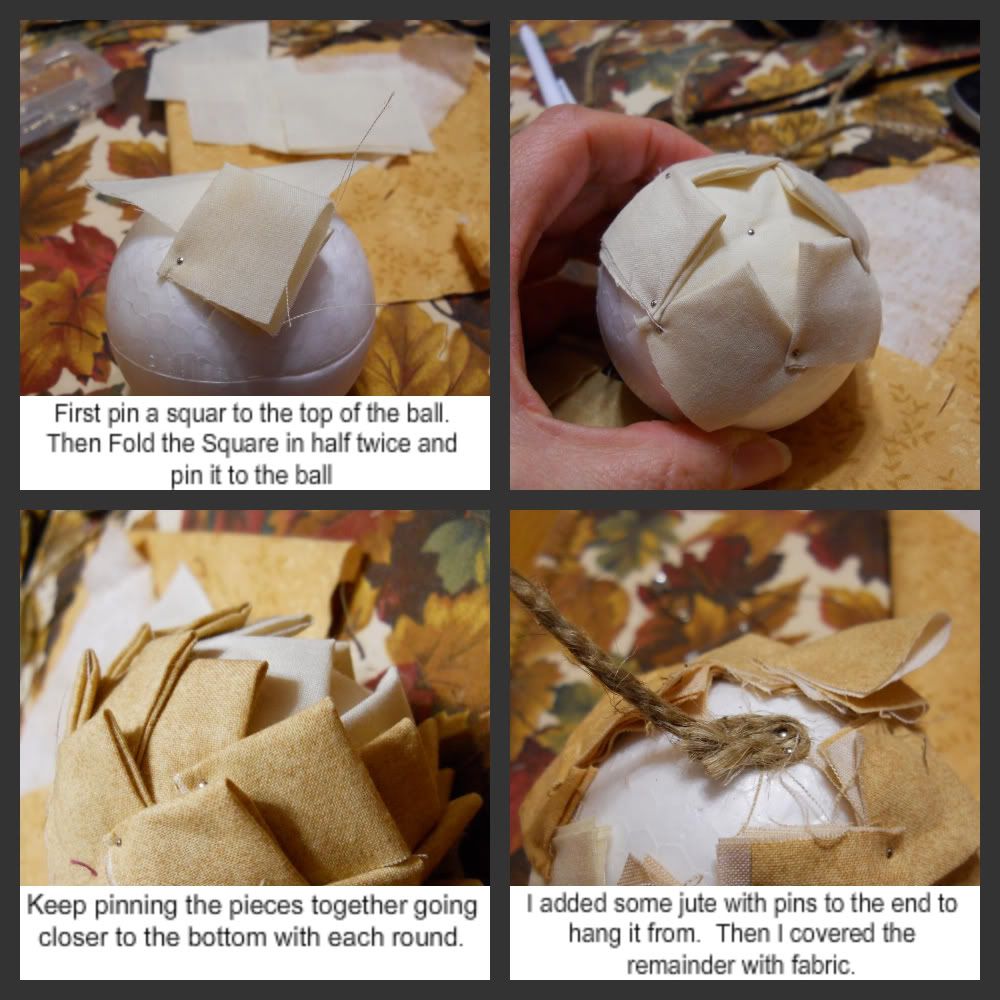
Keep doing this until you have the Styrofoam balls covered.
As you can see you can add different colours of fabric to the same ball. The I wanted to add a bow.
I glued a gold ring to the back of the bow. Then I used a little red lace as well for colour.
Keep doing this until you have the Styrofoam balls covered.
When making the bow, I used a Christmas Lace. I made the bow in the second frame and then made a bow without tails in the third frame to put behind the first bow. I also added a piece of lace to the hanger to make it fuller.
I glued a gold ring to the back of the bow. Then I used a little red lace as well for colour.
Decorated Flower Pot
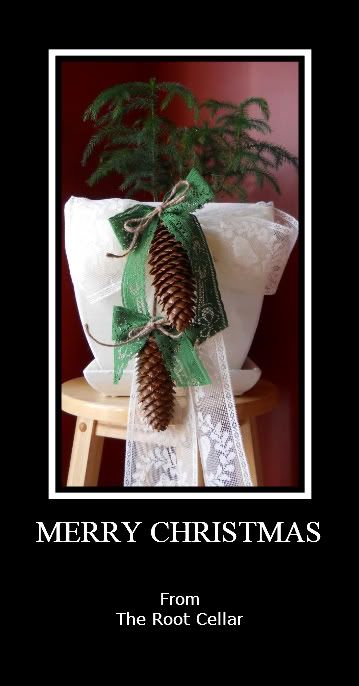
I have not started to decorate for Christmas, but I plan to begin this week. In the meantime, I am still making some things. I went home for the weekend an discovered that a tree next to my parents' house had beautiful cones. I brought them into the house and dried them on the wood stove so that they would open up. As you will see, I have plans to use a fair number of cones this year. Here is the beginning of the cones for Christmas.
Then I got two of the cones that I had prepared on the weekend.
You can see how much they opened on the stove when looking at both pictures. My hands were sticking together when handling them, but when they dried they looked like I had put a gloss on them.
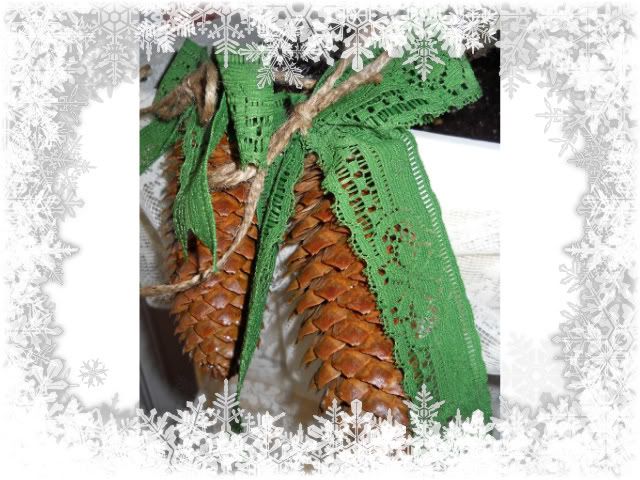
I tied some green lace and jute and glued them to the cone. I used a piece of jute to then attach the cones to the bow.
This was the arrangement that I ended with, but those cones look good anywhere on the flower pot.
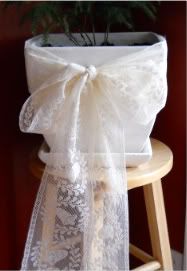
I began with a plain flower pot that I recently put a small tree I purchased last Christmas. It had outgrown it's previous one. I wanted to add a little for Christmas. I first tied some Christmas lace around it into a bow.
I tied some green lace and jute and glued them to the cone. I used a piece of jute to then attach the cones to the bow.
This was the arrangement that I ended with, but those cones look good anywhere on the flower pot.
Sunday, 4 December 2011
Gifts Under 10.00
Today, I have been guest posting at http://www.thegrantlife.com/. Kelly is hosting a Christmas Party event of gifts that can be made for less than $10.00. A while ago I posted my Scrappy Coasters and she requested me to post the project today. Since the original post, I have added a number of samples of the coasters. Drop by Kelly's site to have a look at all of the great ideas that have been posted so far.
Monday, 28 November 2011
Christmas Cake
I don't normally post my cooking/ baking adventures, but I decided to share a recipe that has been in the family for as long as I can remember. I think it may have come from my father's brother-in-law, Uncle Bill Burry. I think it was a recipe that his mother used to make and he gave it to his wife to bake and from there it was distributed throughout. I recall Aunt Margaret saying that Mr. Burry used to say that if you went out for a day in the woods all that was needed for a lunch was a piece of this cake. I have to admit it is very filling, considering it has almost four lbs of fruit and nuts.
Preheat oven to 300 degrees. Grease a tube pan and lightly flour.
Liquids:
Fruit and Nuts:
Dry Ingredients:
Combine the following dry ingredients. I usually add them to the fruit since the fruit has to be floured prior to mixing with liquids to prevent them from sinking to the bottom of the cake.
The result is a yummy Christmas Cake. It freezes well and it is a favorite.
Preheat oven to 300 degrees. Grease a tube pan and lightly flour.
Liquids:
- 1 1/2 cups strong tea that has been cooled.
- 1 tsp vanilla
Fruit and Nuts:
- 1 lb Raisons ( Approximately 450 g)
- 1/2 lb cherries
- 1/2 lb dates
- 1 lb currants
- 1 cup walnuts
Dry Ingredients:
Combine the following dry ingredients. I usually add them to the fruit since the fruit has to be floured prior to mixing with liquids to prevent them from sinking to the bottom of the cake.
- 3 cups flour
- 1/2 tsp cloves
- 2 tsp baking soda
- 1 tsp all spice
- 3 tsp cinnamon
- 1 cup margarine
- 1 1/2 cups brown sugar
The result is a yummy Christmas Cake. It freezes well and it is a favorite.
The Root Cellar: Hanging Arrow Decoration
The Root Cellar: Hanging Arrow Decoration: It has been a busy week. I have completed a quilt, started another, made Christmas Cakes, and just the everyday hustle and bustle of life. ...
Hanging Arrow Decoration
It has been a busy week. I have completed a quilt, started another, made Christmas Cakes, and just the everyday hustle and bustle of life. I just got a new computer so now ready to blog some of that stuff. Can not do some though because I have to wait until after Christmas.
This week I made a hanging decoration to go on my arrow sign. I have to apogize for not having pictures of each step, but they were lost in the transition from an old computer and this one. Still want to show what I did though. This is the end result.
This week I made a hanging decoration to go on my arrow sign. I have to apogize for not having pictures of each step, but they were lost in the transition from an old computer and this one. Still want to show what I did though. This is the end result.
I started with an old picture frame. I got this idea from Sarah at Alderberry Hill who had recently used a photoframe for one of her post. Then I covered the frame with Holiday Time Christmas ribbon that I purchased at Walmart. I glued the ribbon to the frame. Since the decoration has to be double sided, I did this to try to get rid of the original look of the back of the picture frame. Then I wrapped some red lace around the frame.
Next I used more Holiday Time ribbon of a different pattern and made a bow. I love the berry pattern.
I attached it to the frame so that the bow was visible from the front and back.
Then I hung my Dollarama bulb between the legs of the bow. (Is that what they are called? :)
There was still more space left since the frame is farely large (11x14). So... I added another bulb and some berries and a couple of pine cones that I found on a trail while walking the dog.
Sunday, 20 November 2011
Wooden Sign
This week I have been using some scraps of wood to make a Christmas sign. When I started I had the wood and some paint. Then I let my creativity take over and this is what I was left with. I couldn't get the pictures to capture the full beauty of these little things, but you will get the idea.
I started with some scraps of wood that I painted a red color, except for the front side.
Then I Mod-Podged (not sure if that's a word, but it is in my dictionary) some tissue paper with gold snow flakes on it to the front. I printed large letters from the computer onto card stock paper and painted them black. These went on top of the tissue paper, again with Mod Podge. I put this picture in B & W to make the pattern more visible.
Then I did Joyeux. This is an illustration of how I did the word and the letters in Noel.
I added some lace to the block of wood and put some berries and greenery on the top.
Then I added some to the NOEL pieces.
Tuesday, 15 November 2011
Snowman
As a part of my new Christmas display I am adding a snowman to the Candy Cane Can. I am pleased with how it turned out and it was not difficult to make.
I began with three rectangular pieces of muslin that I had stained a little in strong tea. For these the length was 2 times the width, so that it would be a square when folded. I folded each into a square.
Then I stitched the side directly opposite to the fold, leaving two ends open.
Here is one of the completed balls. I repeated this process three times with each of the different sizes.
When three of them were done, I stacked them up and glued them with the glue gun. That thing is not getting much of a break these days. Now to add the accessories to make it look like a snowman.
I began with three rectangular pieces of muslin that I had stained a little in strong tea. For these the length was 2 times the width, so that it would be a square when folded. I folded each into a square.
Then I stitched the side directly opposite to the fold, leaving two ends open.
Using a needle and thread I stitched one of the ends. I pulled it together as seen in the picture below.
Then I stuffed the other end and stitched that one around and pulled it together as well. I made sure the opening was closed and secured.
Here is one of the completed balls. I repeated this process three times with each of the different sizes.
When three of them were done, I stacked them up and glued them with the glue gun. That thing is not getting much of a break these days. Now to add the accessories to make it look like a snowman.
The Nose. I made a cone shaped piece from the muslin. Then I stuffed it and glued the end together. To give it a flat surface, I glued a button to the end. Then I painted it. The paint stiffened it as well.
I added three fabric coved buttons. Some ribbon for the scarf, buttons for the eyes, and snaps for the mouth. Doesn't the nose look like a carrot?
Then I needed a couple of arms. I made them from muslin and stuffed them and glued them to the body.
I brought the arms forward and attached them to the side as well so that they didn't just hang straight down. Notice the blushing cheeks-- I used some of my own blush.
I added a wreath to the head. I may make a top hat a little later for him. I added the Candy Cane Can as well.
Then I started to make my Button Wreath and needed more of the ribbon that I used for his scarf, so I took his scarf and made one out of red felt and tied some of the ribbon wire as well.
Subscribe to:
Comments (Atom)


